Showing posts with label tutorial. Show all posts

Friday, 14 July 2023

Christmas Bauble Card x


Happy Friday lovelies

Hope everyone is well? Having a good week so far? It's been crazy weather up here in Scotland and busy super bust with work. Feels like all my brain cells have disappeared after designing something special coming in a few weeks, so keep your eyes peeled for a............. Tree lol

Today I'm sharing my latest tutorial over on Youtube


I love a Bauble Card and had this on my list to make for a while and with it so busy this week decided this would be the perfect time. I designed a basic babble shape for anyone that wants to make there own but in the tutorial I show how you can use your dies to make your own

I made one before the tutorial to show what to expect in lush old First Edition papers but everything els eon the cards were the same


The flowers were made with a Chloe's Creative Cards die, Christmas Magnolia that I used the pattern papers along with vellum to make. I stamped and embossed in Gold for the main card and a Slate Silver for the paler one. Both I inked up with my Distress Oxides and shaped added lots of gems and glitter


The rich blue papers on the main card are from Craft Consortium and are the Ink Drops Ocean colour way. They are the most prettiest papers EVER and you know how much I love pattern papers. I also added some older snowflakes dies to the main card


I used some Chloe's glitter on both card, above I used Blue Diamond and the gold is Dulce de Leche. Below I used Sky's the limit and soft turquoise colour with silver sparkle


I added the glitter to the middle of the flowers with my gems along with the paler blue having embossed stamens and the main card I added gold glitter to the stamens 

But which one is your favourite? I can't decide? The pale is so pretty and the bold just pops


You can find the tutorial here plus in the description there is a link to a free Template so you can make your own. I can't wait to see what your version will look like

Until next time
Huggles Mel xx


Glitter -Chloe’s Creative Cards - Dulce De Leche and Blue Diamond Sparkle
Stamp and Die Set - Christmas Magnolia
Vellum
Gilding Wax - Empire Gold
Gold Embossing Powder
Gems from stash and AliExpress
Hot Glue Gun

Lighter Blue Bauble -
Pattern Papers - First Edition 12x12 - Winter Wishes (really old)
Glitter - Chloe’s Creative Cards- Starlit Sky

Friday, 30 June 2023

Merry-Go-Round x


Hello you lovely lot,
I hope this finds you all well? Have you been crafting? Is in Christmas yet for your crafting or is it still too early for you? I’ve been working away on Christmas makes already so felt that my latest tutorial should be the same

Away last year my lovely editor challenged me to create something different and of course I jumped at the the challenge, a little Merry-Go-Round. It was designed especially for the Hunkydory Magazine but decided I had to make it again. This is the original design using the magazine kit


What do you think? The original had a fantasy feeling with the unicorn stamps and gold mirror card and embellishments. I knew I wanted to make the next one a little different and with Christmas on my desk, decided to go with it


I used some older Christmas papers from the Craft Consortium called Candy Christmas and teamed it with brown cardstock and older pink papers to layer. The cute little Deer is a digi stamp I found on Etsy from Zekesami, here is the link. I coloured it up with my Copic Markers adding some glitter to the antlers and spots.


The gems are mostly from my stash that I got from AliExpress or Chloe’s Creative Cards and the very bright pink ribbon I got from Amazon in a pack. I also added some wee battery fairy lights, gluing the battery pack into the Gift Box Base and feeding through to hide around the edges


The fun part is the Merry-Go-Round actually turns. I fitted a piece of pipe to help keep it steady in the middle and when you turn the top the wee Deers are go round like old fashioned hobby horses. See the wee video below to see it working


My tutorial will show you how easy it is to make your own, even with a few mistakes lol. You can create your own by using the free download found over at Craft World HQ, free to all members. 


I hope you will create your own. Especially making your own Christmas Decoration or Trinket/Gift Box with plenty from to fit a gift, treat, sweets or even a Gift Card for someone Special 

You can also find more of my YouTube tutorials on my channel, why not check them out.

I best get back to work, more Christmas makes. Until next time
Huggles Mel xx


Materials - 
Template -Merry-Go-Round
Plus older Craft Consortium Ink Drops Rose
12x12 Bazzill Card 
Digi Stamp - Zekesami 
Neenah Stamping Card
Printer
Gems from stash and AliExpress
Hot Glue Gun
Ribbon - Amazon
Copic Marker Colours - Dark Brown - E29, E18, E17, E15 Light Brown - E13, E11, E00 Cheeks - RV52 Paper Edging - RV55

Friday, 16 June 2023

Fairy House Tutorial


Happy Friday lovelies

I hope this finds you all well and enjoying the gorgeous summer weather we're getting?? Here in Scotland it's just soooooo warm, but no complaints. Just need a little cooler to get the dog walked instead of at 6am and 10pm at night?? Poor pup that she is

Toady I wanted to share my latest wee YouTube Tutorial with you, a lovely Fairy House


What do you think?? Too busy?? Just right or does it need something? The original template I created for this was for a magazine piece last year, the Hunkydory Box Magazine no.17 but sadly you can't get this as a physical copy another. You can still get a digital version here if you want to see what else the Design team created.


For the tutorial I created a smaller version first to show how its looks


I used some Bazzill pink and yellow 12x12 craft card and added some pretty First Edition Oh So Sweet pattern papers to the top along with some cute little Lawn Fawn fairies coloured up with my Copic Markers. Of course there is plenty glitter along with Mulberry flowers and gems to decorate

For the main Fairy House I used some gorgeous papers from 49 and Market, Art Options Rouge along with more Bazzill 12x12 card in a deep burgundy and smokey grey


I teamed the Fairy House with an older Some odd Girl Digi Stamp, Fairy Magic and coloured up with my Copic Markers added glitter to the wings and face. The Glitter I used was some older glitter glue with loose glitter added in to make it extra sparkly. The small butterflies are from very old Martha Stewart punch but you can find similar here


The template has an open space in the bottom to allow you to pop in a wee faux tea light or fairy lights and light up through the vellum windows


Remember you can find the tutorial over on my YouTube Channel as well as lots of other to keep you busy while it's too warm to sit outside. You can also find the link to the template here

Until next time, stay safe everyone and make sure to drink plenty during the hot weather
hugs Mel x


Materials
Mulberry Flowers
Martha Stewart Butterfly Punch - Alternative
Vellum
Glitter
Hot Glue
Small Fairy House -

Friday, 2 June 2023

Bow Card Tutorial x


Hi you lovely lot and welcome back to my wee blog

Today I’m sharing my next YouTube tutorial with you all, a wee Bow Card


This time tho I’ve created a FREE download for you all to create your own! Follow the Bow Card Link and you will be taken to a Dropbox download for SVG files and a PDF for you to use with your cutting machine (like a Circuit or Silhouette) or print out and hand cut out instead


I created the above Bow Card just for the video and teach you how, making the pink and turquoise toned one. Both made exactly the same but looking totally different but just as stunning


I used my 12x12 Bazzill card stock along with different pattern papers on each but the same stamp and die set coloured with my Copic Markers. The stamp is from the amazing Alex Syberia Designs called Life is Good and I use the matching Dies to cut it out


I used some different coloured ribbons from Hobbycraft and Amazon along with gems from Chloe’s Bling box and the large gem is from AliExpress. I also added some foliage with an old sizzix die plus lots and lots of glitter


What do you think? Do you see your self creating one? It’s that type of card to give on an Extra Special Occasion, the BIG birthday or maybe a Wedding! The type of card to make people smile and something they will display and keep.

Remember you still have one more day to enter the giveaway, see the YouTube video for all the details plus you can find more of my tutorials here

Until next time, have fun crafting and remember to tag me if you create any of my makes
Huggles Mel x

Materials-
Bazzill 12x12 Cardstock
Pattern Papers - Pink and Turquoise - Cocoa Vanilla - Unforgettable 
Red and Gold Card - Craft Consortium - The Craft Papers - Ink Drop Rose 
Neenah Solar White Stamping Card
Black Stamping Ink
Copic Markers
Chloe’s Creative Cards - Sparkelious Glitter - Starlit Sky
Ribbon from Hobbycraft and Amazon
Gems - AliExpress and Chloe’s Bling Box


Friday, 5 May 2023

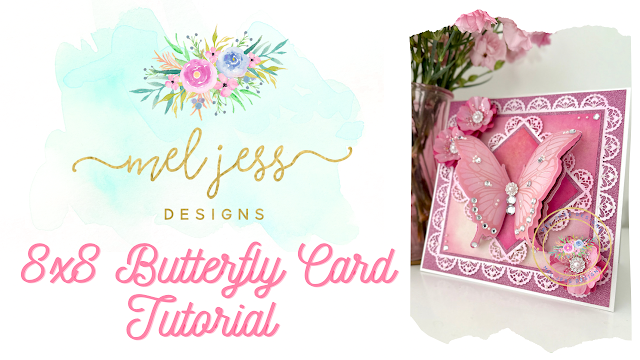
8x8 Butterfly Card Tutorial x


Hello lovelies and welcome back to my blog

Hope everyone is well? Have you been keeping busy and finding time to craft? What have you making? Me?? I've been working away in the background on some special tutorials, something made especially for yous. Also I'm working away on some fun Magazine pieces, lets just say some fun girly buts will be coming in a few months

Today I wanted to share a tutorial or the Butterfly card I created for my Mum's Birthday. I had so much love on it and when I got a few requested to create a tutorial knew I couldn't say no.


In the video I show you have I made this lush pink jewelled tones card using all the same materials I used for my Mums card. I also created a green version before the tutorial to show in the video


You can see even tho I've used all the same material the card looks different but still 'pops' no matter the colour way! I think the green is my favourite, what about you?? Could you imagine this in all white??? Or even in all the colours of the rainbow??


I used the Craft Consortium Over the Rainbow Papers of both cards, teaming with glitter and Ventura Pearl card from my stash. The top layers on the flowers and Butterfly is embossed and inked Vellum. gives a 'porcelain' look my hubby says

Remember you can fin all the material details below and the video is over on my YouTube. Please give it a watch and listen at the end for a little upcoming SURPRISE

Until next time
Happy Crafting everyone
Hugs Mel x


Material
Centura Pearl - Hint of Gold
Vellum and Glitter Card from stash
Chloe's Creative Cards - Grande Butterfly Die
Chloe's Creative Cards - Country Flowers
Chloe's Creative Cards - Lacy Square Layering Dies
Distress Oxide - Picked Raspberry and Rustic Wilderness for the green card
Embossing Powder - Lindy's Gang -Geranium Coral Blush and Oakleaf Olive for the green card
Glue
Gems
Hot Glue

Sunday, 23 April 2023

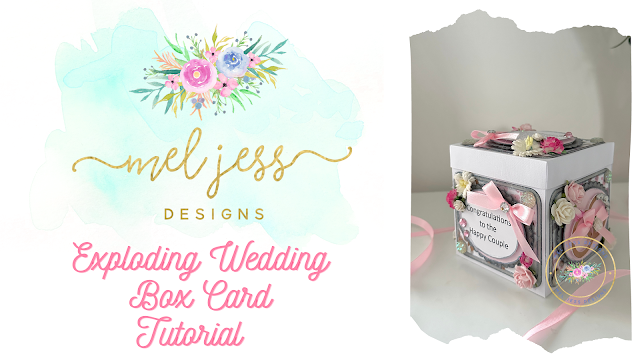
Exploding Wedding Box Card


Hello you lovely lot
Hope everyone is well and had a super weekend? We were lucky and managed to get away and enjoy the glorious sunshine. Jura was loving it!
Have any of you been crafting? What have you been making/working on? I’m busy working away on something a little ‘fruity’ but can’t sure just yet. Keep watching for a little something sweet coming soon

Now today I’m sharing another wee YouTube Tutorial with you all, an Exploding Box Card. 


Some of you that have followed me for years all know how much I love making these and knew it was about time I shared how I make them. I really hope you will give it a go once you see how easy it is


I used some really old Prima Marketing 12x12 pattern papers but you can find similar in lots of different brands and I teamed it with printed sentiments and lots of die-cuts but you can add anything to decorate and personalise for the lucky person or couple


Remember if you make something following one of my tutorials please let me know, tag me @meljessdesigns on any of your socials

Have a great week lovelies and and here’s to another fun crafty week
Hugs Mel x


Materials; 

Bazzill 12x12 Cardstock

Prima Marketing Pattern Papers (very old but can still find similar)

Toppers die-cuts cut with Silhouette Cameo 4

Glitter Glue - Tonic Nuvo Glitter Drops 

Glue - Tonic Nuvo Adhesive

Gems from stash

Ribbon

Mulberry Flowers from stash

Hot Glue Gun